21. Fitting Outer Gunwales
add the steamer tip
300 words 2 minutes
Trimming The Fore Transom
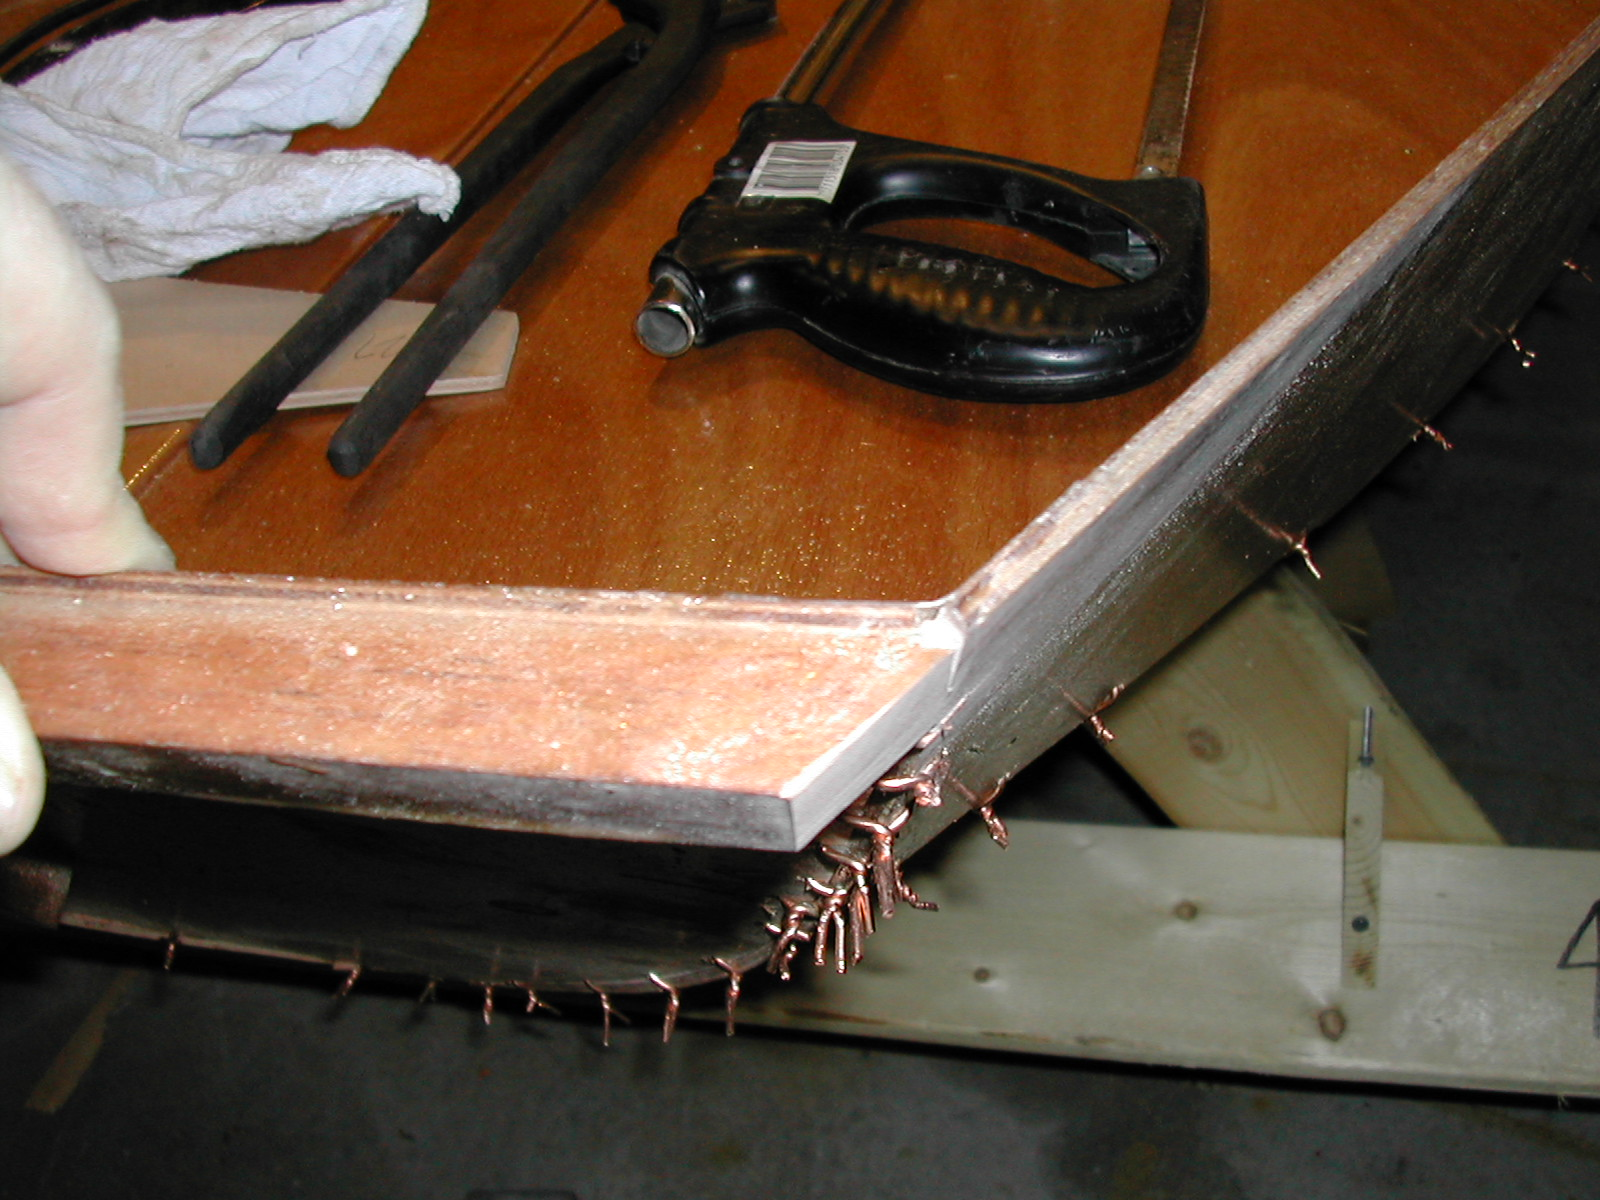
The instructions do not really describe the step shown in the photo, but it becomes obvious that it needs doing. The gunwale piece that is attached to the fore transom needs trimming. Trim both side carefully to the angle of the side hull.
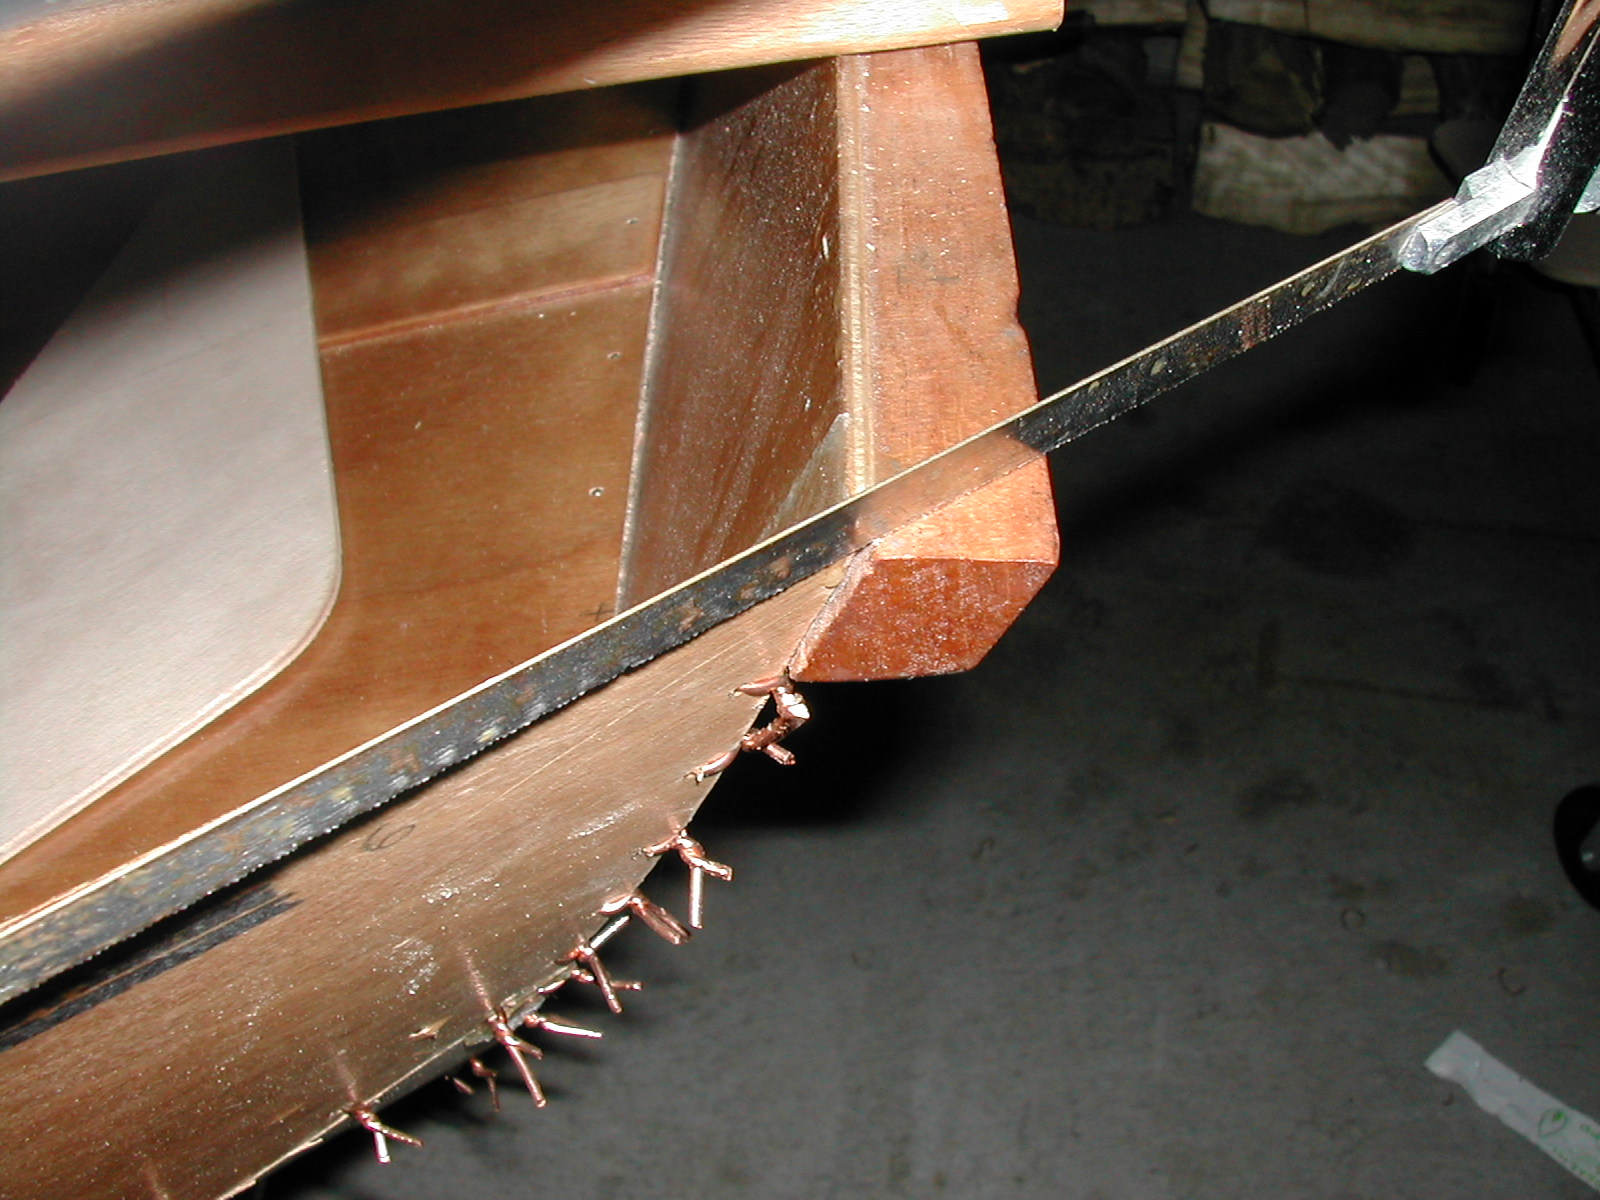
This picture shows the finished cut.
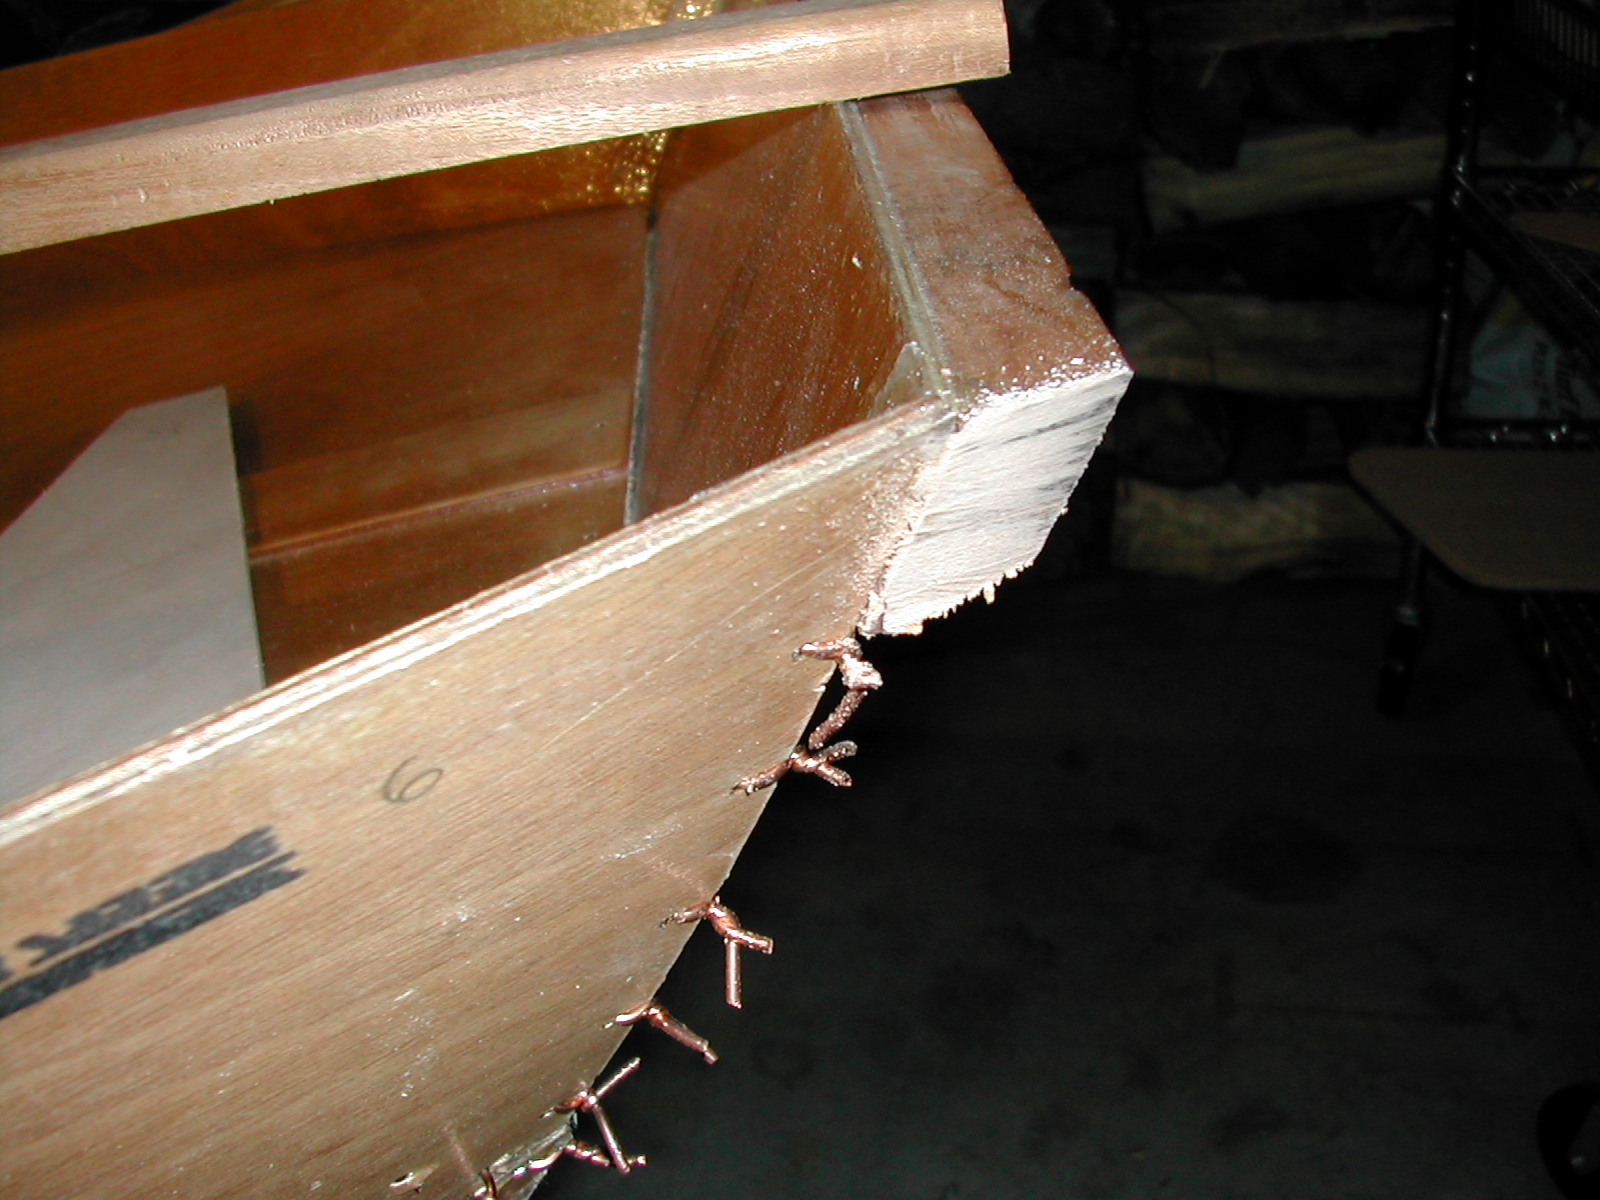
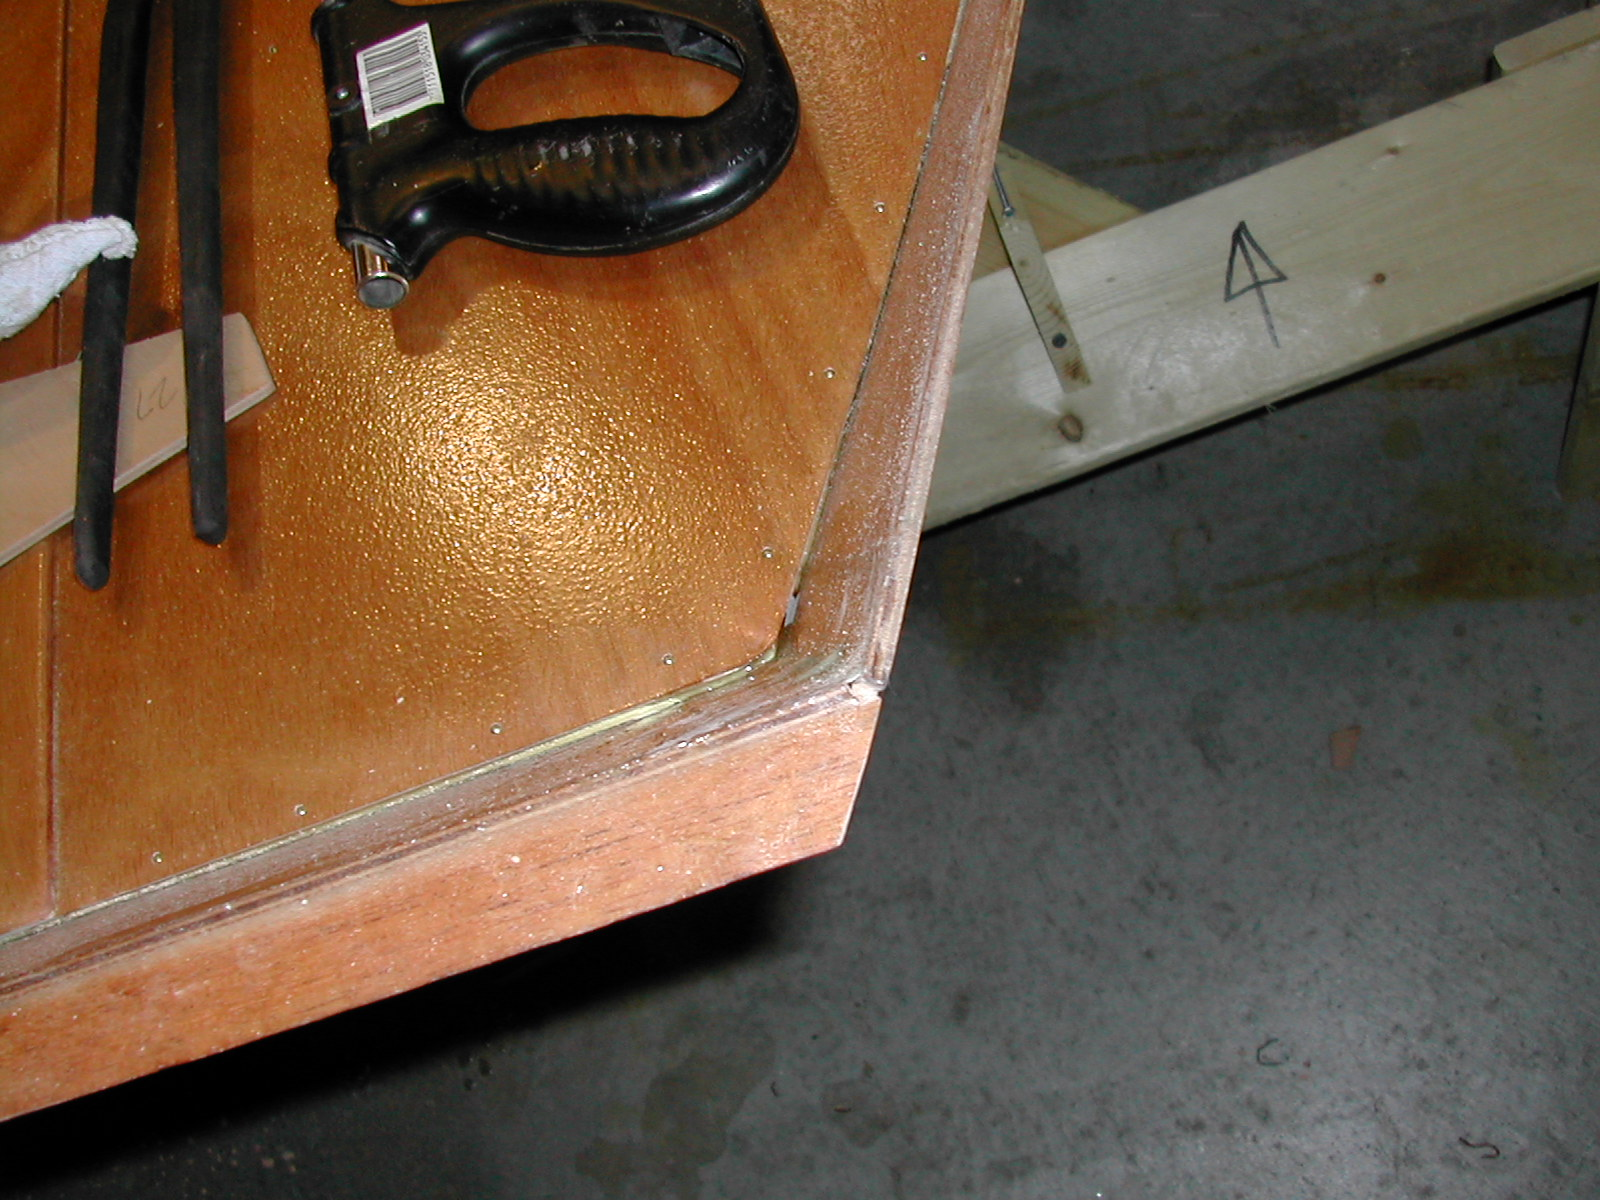
This picture shows the other side, which also required trimming. Once rough cut, sand it to conform to the hull’s shape. I used a belt-sander.
This is an overhead shot showing the perfectly aligned cut, awaiting the outer gunwale, which will be attached shortly.
Wallpaper Steamer Technique
If you haven’t been bending the gunnels for a while you may have difficulty bending them into shape, a great way to make them bendy is by putting them in a tube and filling it with hot wet air using a wallpaper steamer, see: steam bending.
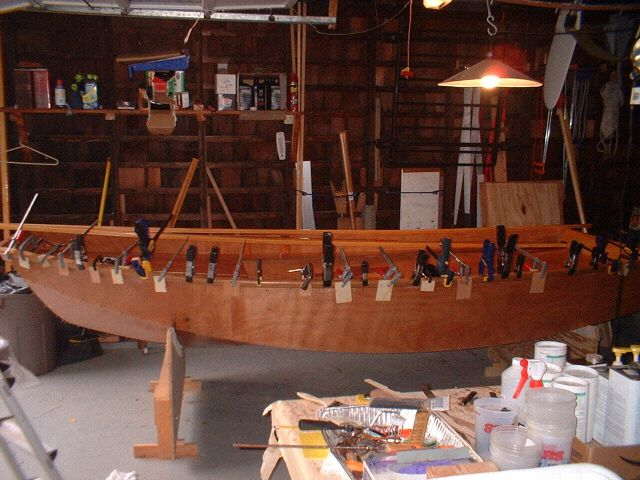
Attaching Gunnels
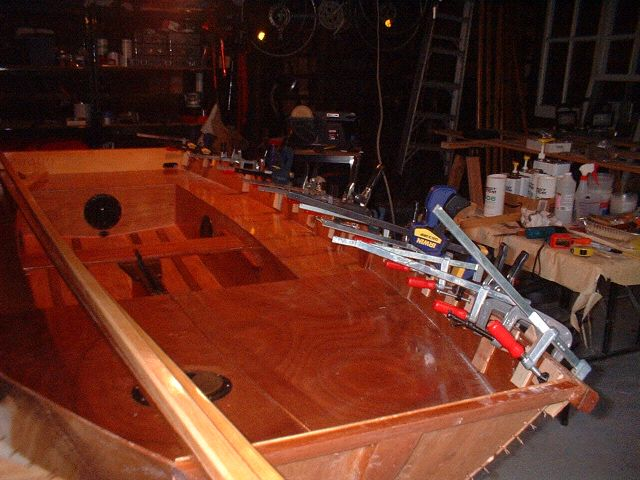
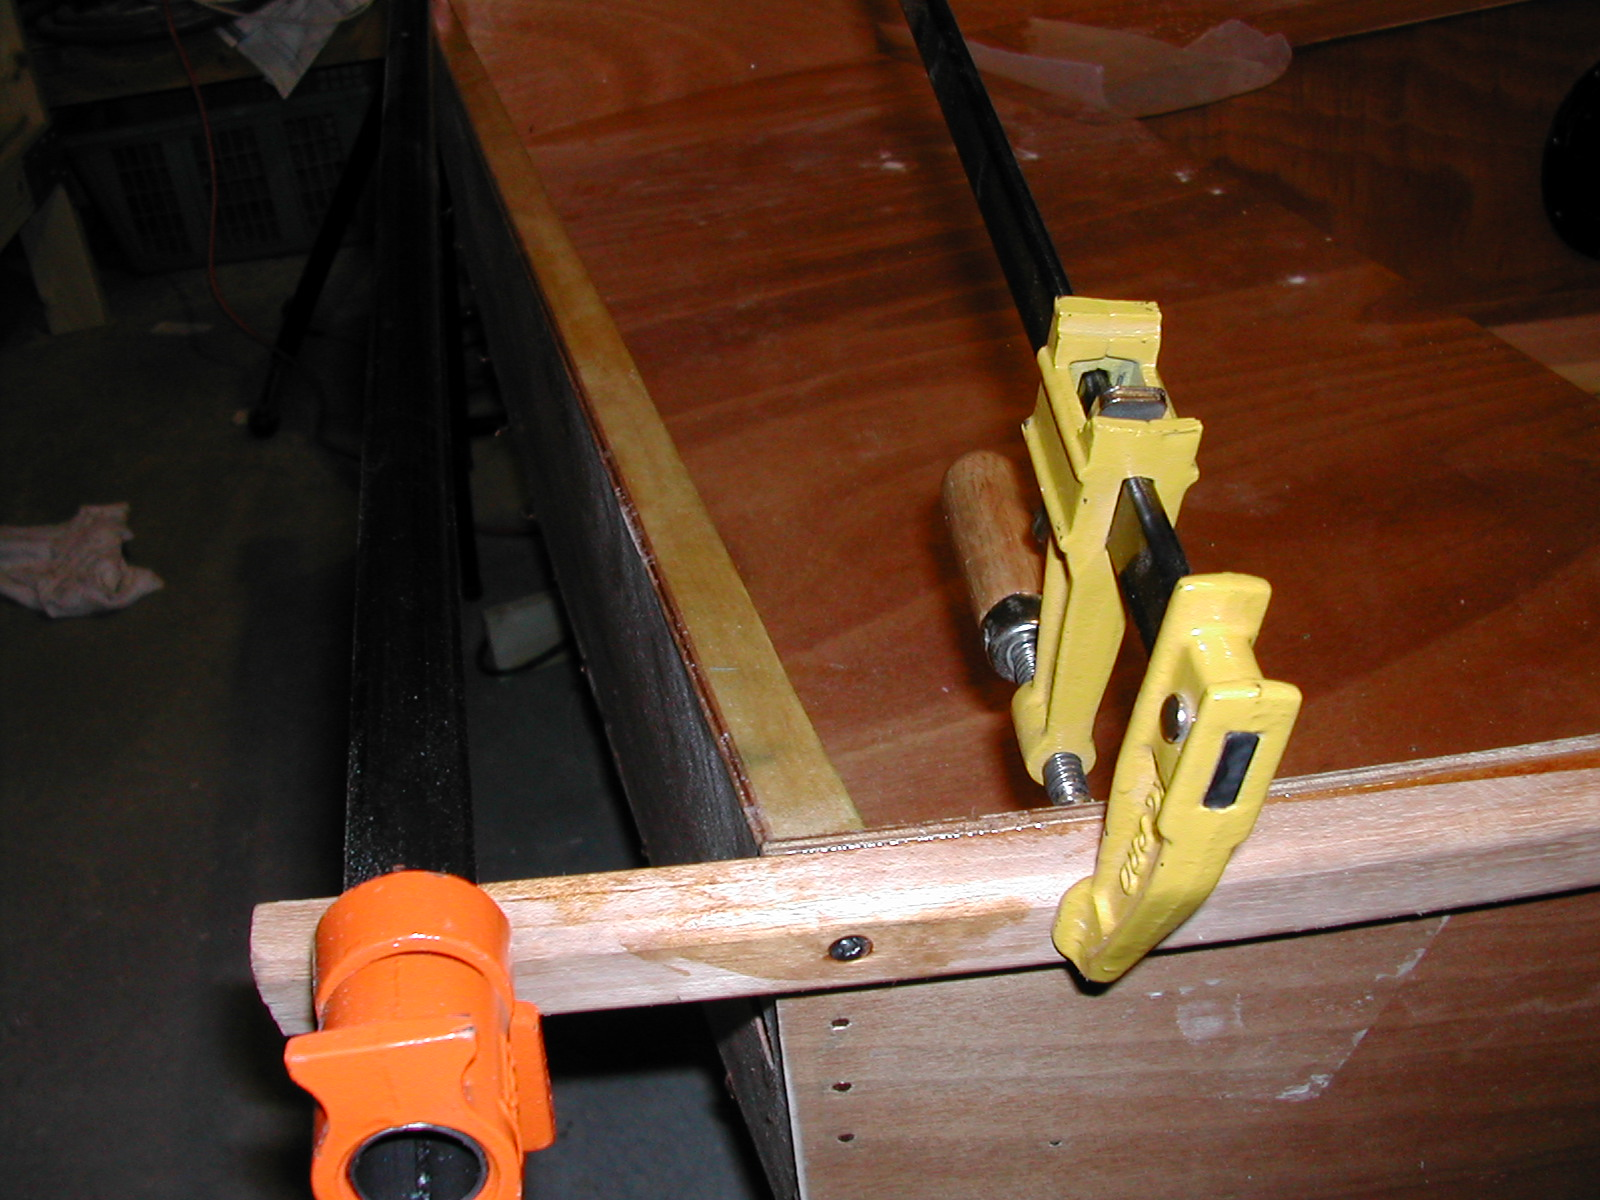
The outer gunwale is glued, and clamped using your entire inventory of clamps, spring-clamps, and scrap wood. It is important to make sure that there are no gaps between the gunwale and the upper hull panel.
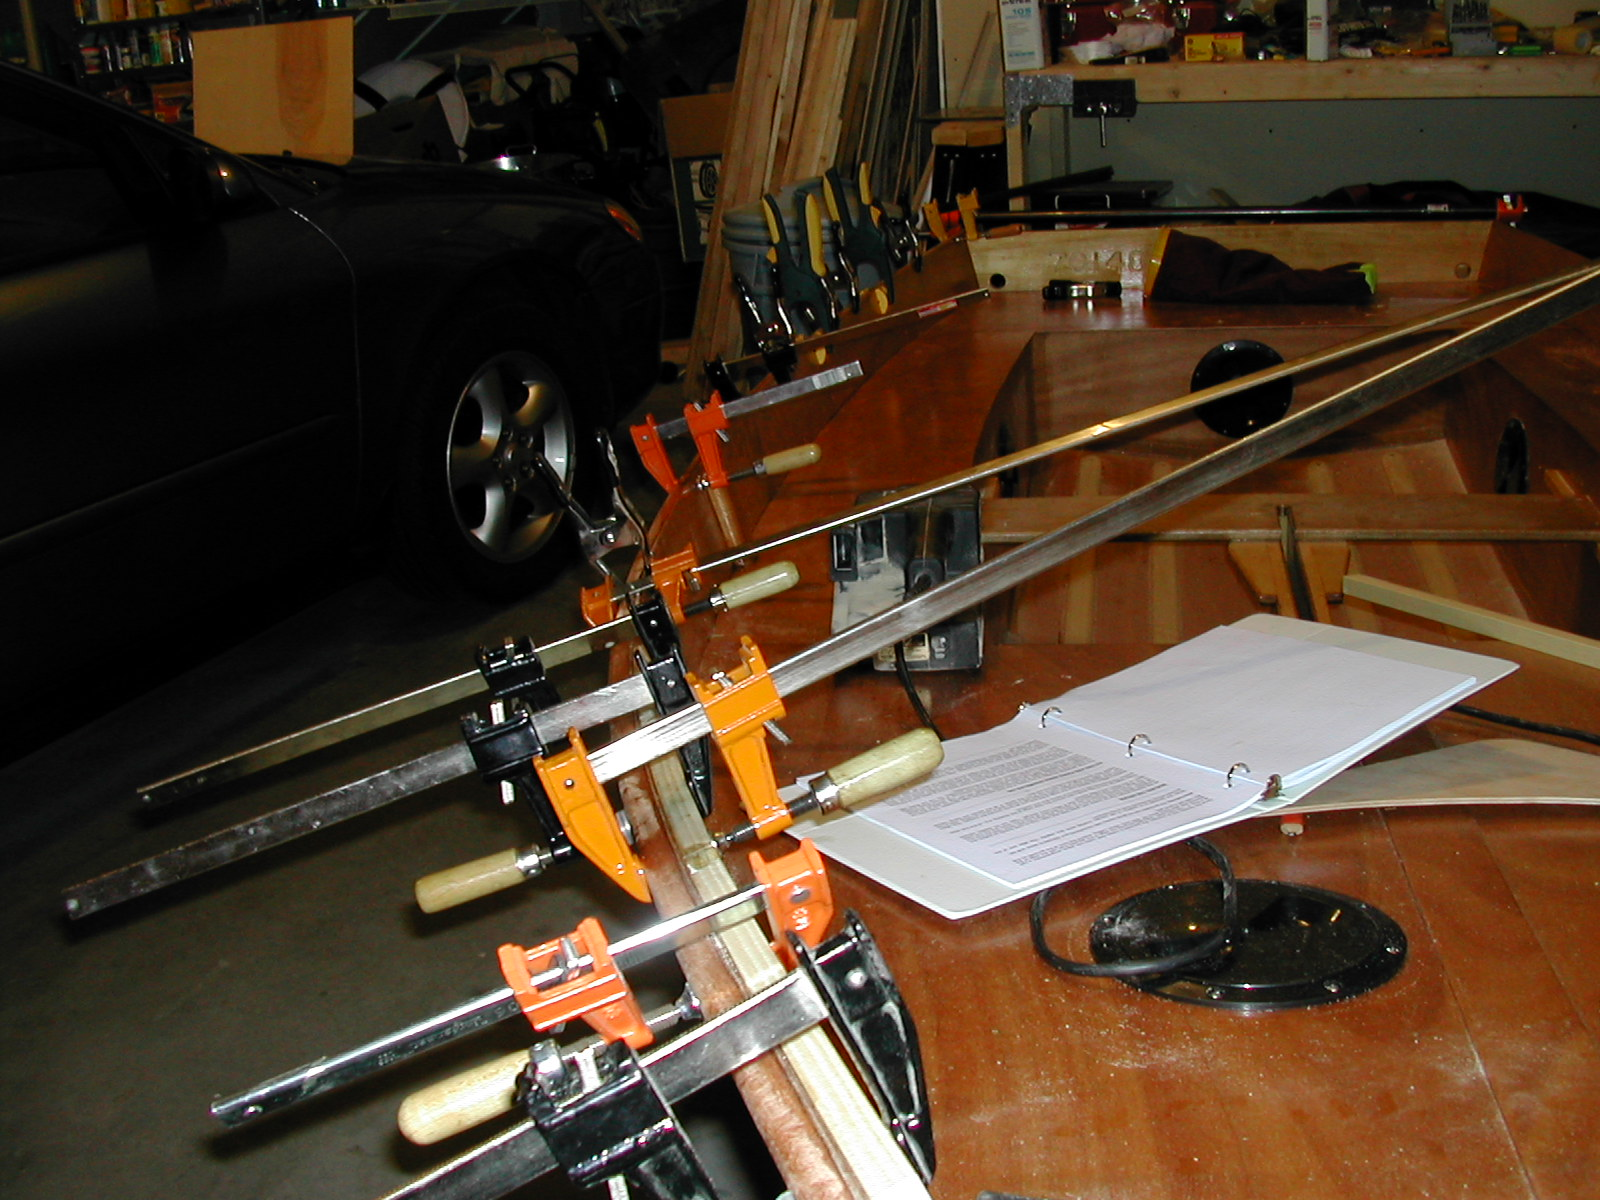
Scrap wood and lots of clamping is used as the gunwale bends toward the fore transom. The instructions stipulate that for the forward 24 inches, the gunwale rises as it approaches the fore transom, finishing up 1/8" above the hull panel. Why this is done will become clearer once you attach the inner gunwales, which will be correspondingly lowered in relation to the hull as they approach the fore transom. The point is to make the upcoming sanding - which will form a flat, level surface for the bowshapes - somewhat easier.
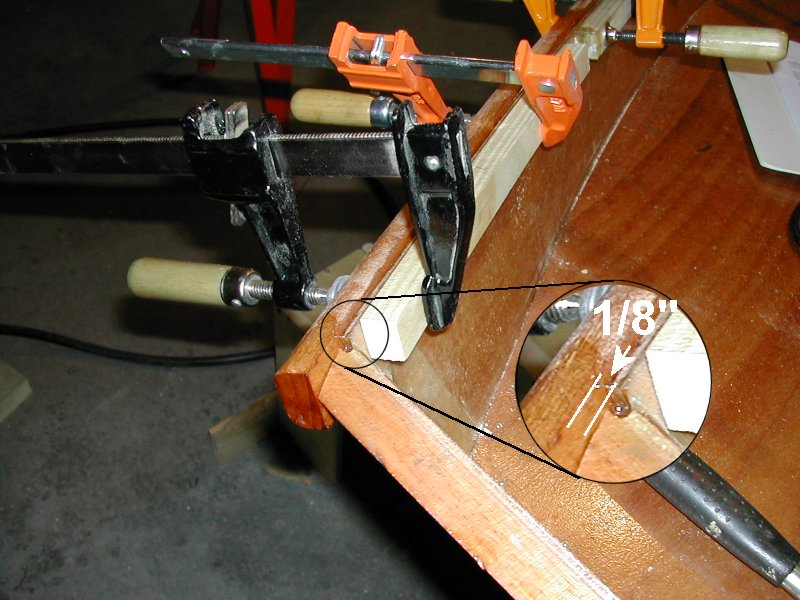
The rear of the gunwale is optionally attached with a screw (as is the front of the gunwale).
Clamps
You’ll need lots of clamps